

A golden hour wedding video uses the warm, low-contrast light before sunset to create cinematic, romantic footage that needs almost no correction in post. Couples choose it because it flatters skin tones, softens shadows, and reads as authentic rather than staged. Getting it right means locking a time block into your timeline, briefing your videographer, and knowing what a good sunset reel actually looks like.
TL;DR:
- Capture golden hour footage within a 30-minute window around 20 to 30 minutes before sunset to ensure optimal warm, soft lighting.
- Schedule at least 30 minutes for the shoot, with additional buffer time, and coordinate with all vendors using a precise call sheet to avoid missing the ideal lighting.
- Ask your videographer for full sequence samples, equipment setup details, and backup plans for weather or schedule delays before booking.
- Use equipment like variable ND filters, appropriate focal length lenses, and stabilization gear to maintain cinematic quality as the light changes rapidly.
- Post-production should focus on subtle warm color grading, consistent skin tones, and natural ambient sound to preserve the authentic golden hour look.
Why Golden Hour Looks Cinematic on Wedding Film
Golden hour is the stretch of time just after sunrise or right before sunset when the sun sits low enough that its light turns soft, warm, and diffuse, according to the standard definition of golden hour photography. That low angle scatters light through more atmosphere, which reduces harsh contrast and creates a soft, warm glow around faces instead of hard shadows.
This matters more for video than for stills, because a camera has to hold that flattering exposure across minutes of movement, not a single frame. The look editors love mostly already exists in the raw footage.
- Low contrast reduces the need for heavy digital correction, giving skin tones a naturally flattering base straight out of camera, per The Knot's videographer guidance.
- The warm color temperature of golden hour light reads as romantic without a heavy color grade.
- Backlighting creates natural rim light and silhouette opportunities that look staged even when they're not.
- The window shortens in summer near the equator and stretches longer at higher latitudes or in winter, so your actual filming time depends on your date and location.
Scheduling Golden Hour Into Your Wedding Timeline
Reserve a sufficient time block for golden hour portraits and film coverage to ensure ample opportunity to capture the best light. That's the standard advice from The Knot's wedding planning guidance, and it exists for a good reason: anything shorter forces your videographer to rush the shot list right as the light is at its best and disappearing fastest.
Here's a simple way to slot it into a full-day schedule:
- Check sunset time for your date and back-plan 45 minutes, since the richest light happens in the 20 to 30 minutes before the sun actually drops.
- Build a 10-minute travel buffer if portraits happen at a second location away from your reception venue.
- Block 30 minutes minimum for the shoot itself, with a soft 10-minute contingency in case cocktail hour runs long.
- Confirm this window with your photographer, planner, and any drone operator so nobody double-books the same 30 minutes.
Timing a ceremony or portrait session around the setting sun lets natural light carry the visual weight of the scene, often reducing how much you need to spend on floral or lighting decor, per The Knot. If your ceremony itself can't move, aim golden hour at your couple's portraits or a sunset send-off instead.
Pro Tip: Give your planner a printed call sheet with the exact golden hour window, not just "sunset." A vague instruction like "let's do photos at sunset" gets lost in a busy reception timeline. A written 6:42 to 7:12 PM block does not.
What to Ask Your Videographer Before You Book
Not every videographer treats golden hour the same way, so ask specific questions before signing anything.
- How many golden hour weddings have you filmed, and can I see a full sequence, not just a highlight clip?
- What's your multi-camera setup for this window, and does a second shooter cover reaction shots while the first handles the couple?
- Do you fly a drone during golden hour, and do you hold the permits required at our venue?
- What's your backup plan if clouds roll in or the ceremony runs late and eats into the light?
For the actual shots, a workable golden hour list includes a backlit silhouette against the horizon, a close, warmly lit portrait of the couple, a wide establishing shot that reveals the venue in context, and one unposed walking or laughing moment. Before you sign, confirm what you actually get: highlight reel length, full ceremony and speech edits, social media teaser clips, and whether raw footage is available. A clear grasp of wedding videography costs upfront helps you compare packages without confusion later.
How to Judge a Videographer's Showreel for Golden Hour Style
A reel tells you more about a videographer's actual skill than a sales call does. Watch pacing first: does the editor let a moment breathe, or does every clip cut in under two seconds because there wasn't enough usable footage? Listen for audio, too. A reel that's all music with zero ambient sound or vows often means the crew struggled to capture clean moments and buried the gaps in a soundtrack.
Color grading is the other tell. Golden hour footage should look warm because the light was warm, not because someone cranked an orange filter over flat, gray footage in post. A beachfront wedding film shot at sunset works well specifically because the open horizon and water reflections do the heavy lifting. The color grade just supports what the camera already caught.
Red flags to watch for in a reel:
- Heavy vignettes or filters slapped over every clip, regardless of the actual lighting conditions on the day.
- Inconsistent grading between shots from the same five-minute window, suggesting rushed or mismatched footage.
- No sync audio at all, which can mean weak moment capture hidden behind music.
- The same three poses repeated across every couple's reel, a sign of a formulaic session rather than genuine direction.
Day-of Tips for Couples During Golden Hour
Pick a location with an open sightline toward the horizon, since a clear view of the setting sun is what creates the backlit glow and silhouette shots everyone wants. Scout it earlier in the day if you can, checking for power lines, parking lots, or crowds that might sneak into frame. A quick walk-through an hour before saves a scramble later.
For wardrobe, avoid stiff fabrics that don't move well in a breeze. Flowing dresses and lightweight suit jackets catch the backlight better than structured, boxy pieces. Loose hair or soft waves read better in motion than a tight, sprayed style, since backlighting tends to flatten anything too rigid.
- Walk, don't pose. A slow walk toward camera or a spin generates natural movement that cuts beautifully.
- Whisper something to each other instead of staring at the lens. Genuine laughter reads better than a held smile.
- Pick one simple prompt per setup, like "walk to that tree and look back," rather than five instructions at once.
Behind-the-scenes accounts of golden hour shoots consistently note that couples relax more during this window because they're less constrained by a formal schedule, which produces more authentic, less posed footage, according to Cameron and Tia's golden hour breakdown.
Pro Tip: Ask your crew to pre-map a short loop around your venue, hitting two or three backdrops in sequence. A mapped route beats wandering and deciding on the spot, especially with only 30 minutes of good light left.
Camera Settings That Actually Work at Golden Hour
Exposure is the trickiest part of shooting into a low sun. Meter for your subject's face, not the sky, or you'll end up with a correctly exposed horizon and a couple lost in shadow. Most cinematographers ride a slightly underexposed histogram on purpose, protecting highlights near the sun while pulling shadow detail up in post, since golden hour footage that's blown out near the horizon can't be recovered.
White balance should stay close to daylight, around 5,000 to 5,600 Kelvin, rather than auto white balance, which tends to fight the warm tones and neutralize the exact color you're trying to capture. Locking a manual white balance keeps every shot in the sequence consistent, which matters once you start cutting between multiple cameras.
Frame rate depends on the shot. Standard dialogue and wide coverage run at 24 or 30 frames per second for a natural, filmic motion. Anything with movement, a walk, a twirl, a veil catching wind, benefits from 60 frames per second, which lets an editor slow it down smoothly for a signature cinematic beat without the choppiness a slowed-down 24fps clip produces.
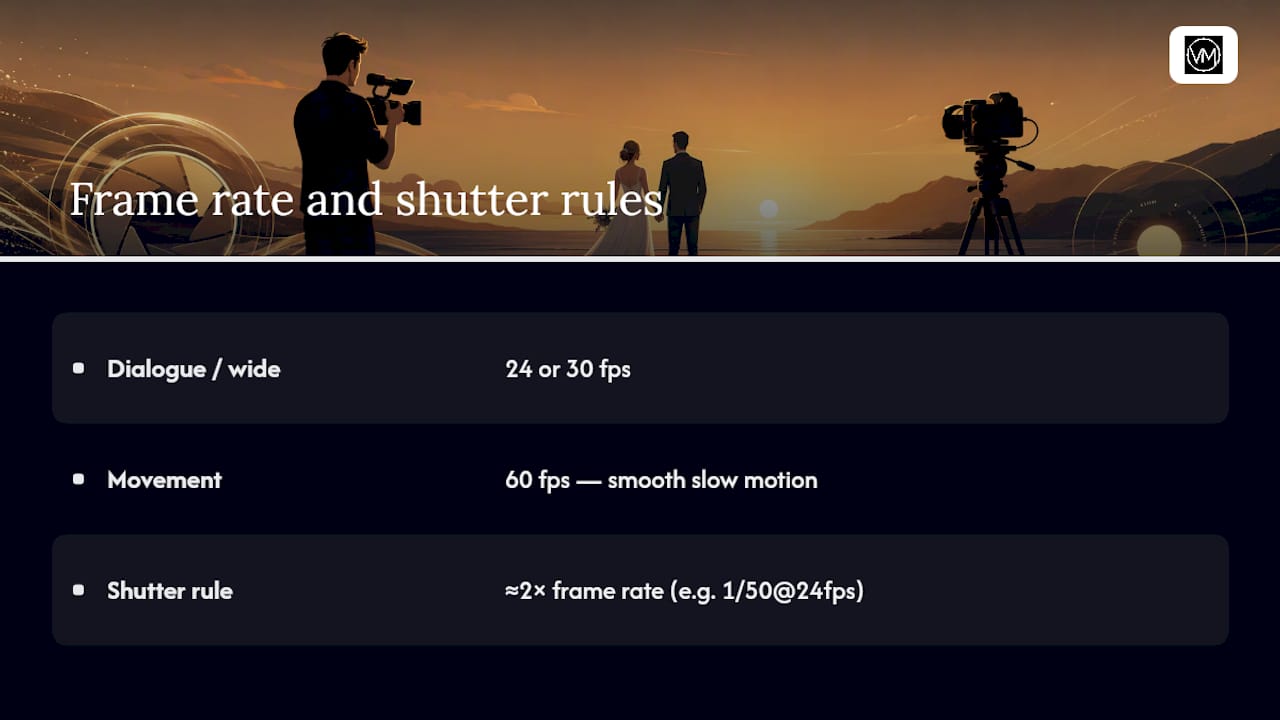
Shutter speed should roughly double your frame rate as a baseline (so 1/50 for 24fps), but golden hour's dimming light often forces a wider aperture instead, since a slower shutter can introduce motion blur on a subject that's actually moving quickly. Balancing aperture, ISO, and shutter as the light drops in real time is the actual skill separating an experienced crew from someone winging it with a single camera and no plan.
Equipment That Makes a Difference at Golden Hour
A variable neutral density (ND) filter is close to essential once the light starts dropping fast, letting a camera hold a wide aperture for shallow depth of field without overexposing as the scene brightens and dims by the minute. Without one, a shooter is stuck constantly adjusting ISO or shutter speed to compensate, which risks introducing grain or motion blur mid-sequence.
Lens choice shapes the mood as much as the light does. A longer focal length (85mm or up) compresses the background and turns the setting sun into a soft, glowing blur behind the couple, the classic bokeh look. A wider lens (24 to 35mm) captures the full environment, useful for the wide establishing shot that shows off a venue's setting. Most golden hour sequences use both across a single 30-minute window, switching lenses or cameras rather than trying to force one focal length to do everything.
Stabilization matters more during golden hour than people expect, since a slow walking shot or a subtle push-in reads as intentional and cinematic, while a shaky handheld clip in warm light just looks unpolished. A gimbal or a well-tuned stabilizer keeps that motion smooth. Multi-camera coverage, one wide, one closer, sometimes a drone overhead, lets an edit cut between angles without repeating the same walk three times from the same distance, which is part of what separates a produced-feeling film from a single-angle home video.
Common Golden Hour Challenges (and How to Handle Them)
The light doesn't hold still, and that's the single biggest challenge of the whole window. Exposure that's perfect at 6:40 PM will be a stop too bright by 6:50, so a crew has to keep adjusting settings in real time rather than locking one setup and walking away. This is exactly why the 30-minute rule exists: any less time and there's no room to adapt as the sun keeps dropping.
Shadows get long and awkward fast, especially from trees, buildings, or hats, cutting across a couple's face at the worst possible angle. Moving even ten feet to a slightly different spot often solves this, which is why a quick pre-shoot location scout pays off more than people expect.
Sun positioning creates its own problem: shoot straight into it and you risk lens flare or a washed-out frame; shoot with your back to it and you lose the glow entirely. The workaround most crews use is a 45-degree angle to the sun, catching rim light on the subject's edge while keeping enough detail in their face. A reflector or even a phone screen can bounce a little extra light back onto a shadowed side of someone's face in a pinch.
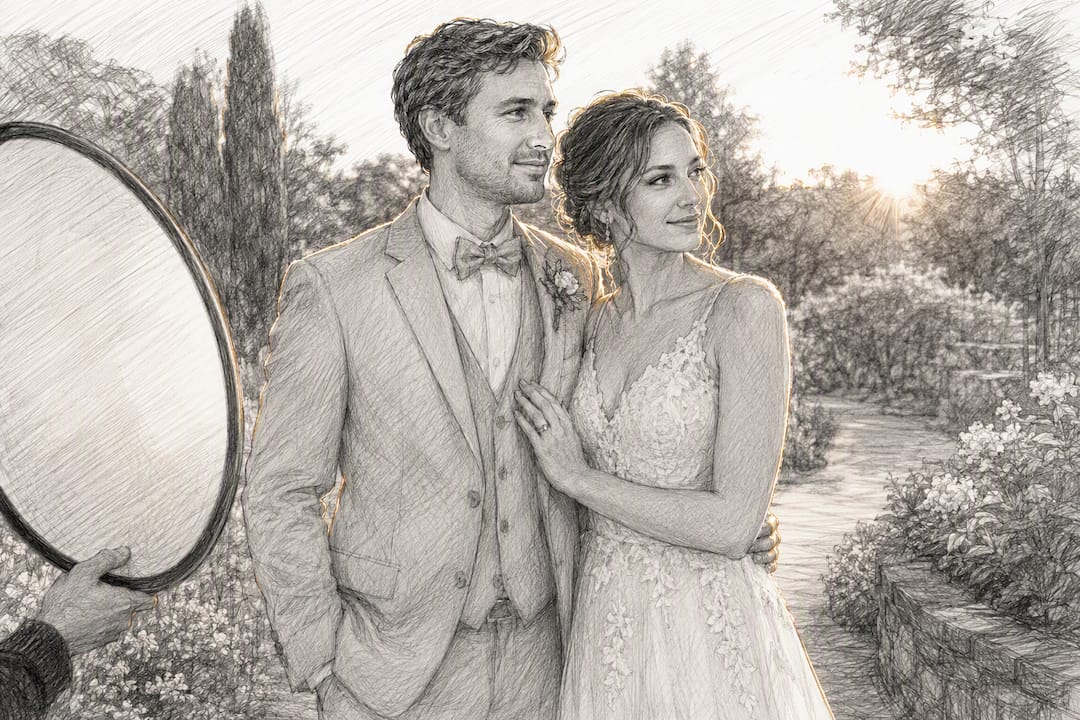
Weather is the wildcard nobody controls. Overcast skies actually diffuse light beautifully and extend the usable window, while a clear, harsh sky right at sunset can blow out fast. A good crew treats the forecast as information, not a reason to panic, and adjusts the shot list rather than canceling the plan.
Editing Golden Hour Footage: Color and Warmth in Post
Good golden hour footage needs a light touch in the color grade, not a heavy one. The goal in post-production is enhancing what the camera already caught, pushing warm tones slightly further into amber and gold, rather than manufacturing warmth that wasn't in the original light.
Start by protecting skin tones first, then adjust the rest of the frame around them. Pulling shadows up slightly recovers detail lost in a couple's face during a backlit shot, while a gentle highlight roll-off keeps a blown-out sky from looking clipped and flat. Split toning, warm in the highlights, slightly cooler in the shadows, adds depth without looking artificial.
Consistency across cuts matters more here than almost any other footage type, since golden hour changes minute to minute. A wide shot filmed at 6:45 and a close-up filmed at 6:58 will have different color temperatures straight out of camera, and a colorist's job is smoothing that transition so the whole sequence feels like one continuous moment rather than three separate clips awkwardly stitched together.
Audio deserves the same care as color. A gentle ambient layer, wind, distant waves, quiet laughter, sits under the music and keeps the sequence feeling real rather than like a stock footage montage. Full ceremony and speech edits, aerial footage, and dedicated color grading can be part of wedding videography packages, treating this stage as inseparable from the actual filming.
Our Approach to Filming Golden Hour Wedding Films
Golden hour can be built into the schedule before the wedding day starts, not as an afterthought squeezed between cocktail hour and dinner. Multi-camera setups may be positioned ahead of time so one angle holds the wide reveal while another stays tight on the couple. Aerial coverage, where permitted, can come in during the same window to capture the reveal from above without eating into the ground-level shot list.
The color grading stage is where the warm tones actually get pulled forward, building on footage that's already flattering because the light did most of the work. Readers curious about the difference between a filmic texture and a fully digital workflow might find our piece on Super 8 versus digital wedding films useful for understanding stylistic tradeoffs beyond just golden hour timing.
Our team has documented this process across dozens of weddings, and the natural light wedding film portfolio shows the range of what a well-planned sunset window can produce, from beach ceremonies to rooftop receptions.
— Anthony
Booking Visualize Media for Your Golden Hour Wedding Film
A videography service may handle the entire golden hour process, including multi-camera coverage, aerial footage where the venue allows it, color grading, and full edits of both ceremony and speeches, to help clients avoid coordinating vendors or troubleshooting exposure settings on their wedding day.
A team can serve couples in various locations and plan the golden hour block into the timeline during the consultation, not as a rushed decision shortly before the wedding day. If you're weighing where to shoot for the best seasonal light, that's a conversation worth having before you finalize a venue. Check availability and request a consultation directly through our landing page, or follow along with recent films and behind-the-scenes clips on our Instagram. Reach out with your date and venue, and we'll map the light before we ever pick up a camera.
Sources
The golden hour definition and its low-contrast, flattering qualities come from established photography reference material and The Knot's wedding planning guidance on timing and scheduling. Behind-the-scenes planning tactics, including the mapped location loop, are drawn from Cameron and Tia's golden hour shoot breakdown, and beachfront filming examples reference Stephan Boeker Films' Maluaka Beach wedding film. For more location-specific and technical detail, browse Visualize Media's natural light wedding film blog and wedding videography guidance.