
Back up first, ingest second, name everything before you open the NLE. That single rule prevents the most common disaster in wedding post-production: a drive failure or a misnamed clip that costs hours of relinking time on a deadline.
When footage arrives, run this checklist immediately:
- Verify checksums on all card copies before ejecting media
- Create a working copy inside a single, consistently named project folder
- Generate proxies if the original codec is heavy (BRAW, R3D, or high-bitrate H.265)
- Log each clip with a brief note before cutting anything
Name the root folder with the date first so it sorts chronologically: 2026-08-15_Smith-Jones_Wedding. Every subfolder and file follows from there.
Key Takeaways
A consistent folder structure, verified checksums, and a logging pass before cutting are the three non-negotiable foundations of organized wedding project files.
| Point | Details |
|---|---|
| Name folders date-first | Use YYYY-MM-DD_Client_Wedding so projects sort chronologically across all drives. |
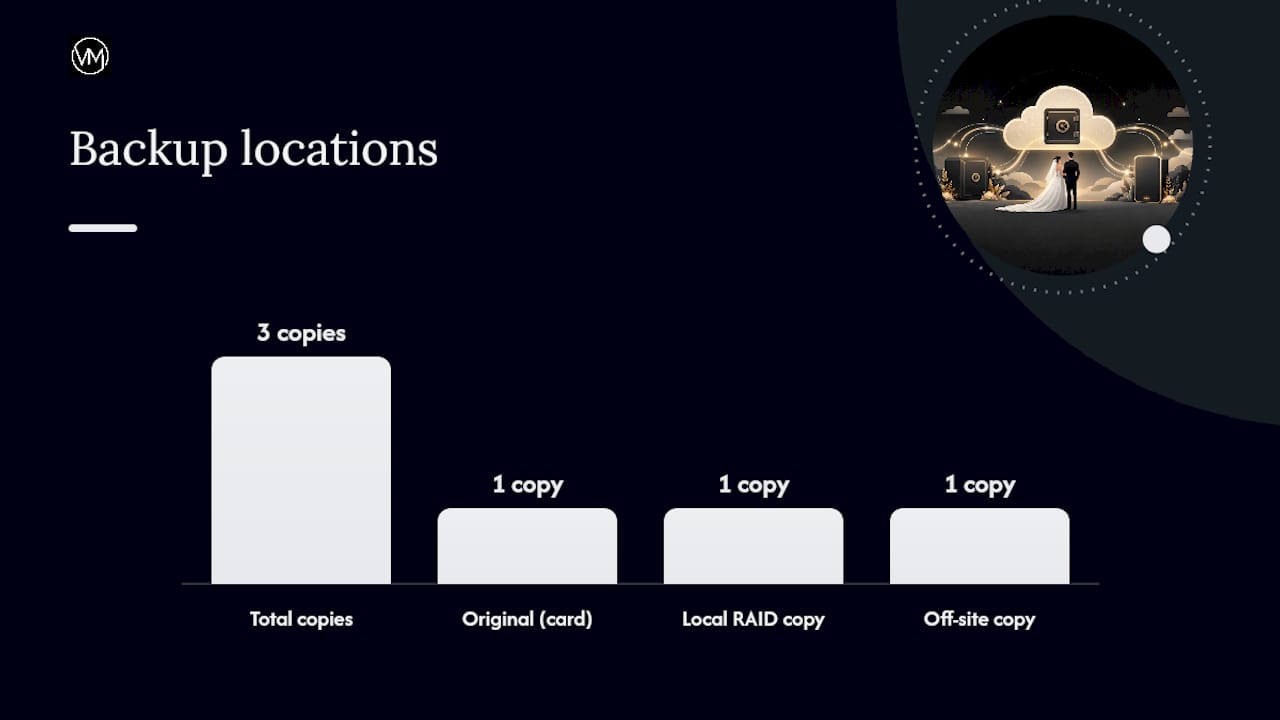
| Apply the 3-2-1 backup rule | Keep originals on card, a local RAID copy, and one off-site copy before editing begins. |
| Log every clip before cutting | Watch footage once and note usable moments; folders tell you where, logging tells you what. |
| Automate Super 8 splitting | Run Scene Edit Detection at 18fps, export CSV, and use split_by_scene.py with FFmpeg to split reels without re-encoding. |
| Visualizemedia's workflow | The team applies this exact structure on every NY/NJ wedding, including Super 8 projects with JSX-assisted editing. |
1. Folder structure templates that actually work for teams
Two templates cover most wedding workflows. The minimal version suits a single editor on a fast turnaround; the professional version handles multi-editor handoffs without relink chaos.
Minimal (single editor):
2026-08-15_Smith-Jones_Wedding/
  01_Assets/
    CAM-A/  CAM-B/  Audio/  Super8/
  02_Project/
  03_Exports/
  04_Documents/
Professional (multi-editor, team handoff):
2026-08-15_Smith-Jones_Wedding/
  01_Assets/
    Originals/  Proxies/  Audio/  Super8/  Graphics/
  02_Project/
    Premiere/  Resolve/  FCP/
  03_Exports/
    Review/  Finals/  SocialCuts/
  04_Documents/
    Logs/  Contracts/  README.md
Professional folder templates that separate assets, project files, exports, and documents with date-first filenames are standard practice for team workflows. DockBuddy lets you save these as presets per project type and route files automatically by extension, cutting manual setup time to near zero.
NLE-specific notes:
| NLE | Project file location | Cache/scratch recommendation |
|---|---|---|
| Premiere Pro | 02_Project/Premiere/ | Set scratch disks to a separate fast drive, not the project volume |
| DaVinci Resolve | 02_Project/Resolve/ | Keep optimized media on a dedicated cache drive |
| Final Cut Pro | 02_Project/FCP/ (Library bundle) | Store library on the media drive; keep backups off the bundle |
Keep project files and media on separate volumes when possible. Use consistent mount names across machines (/Volumes/WEDDING_MEDIA) or relative paths so projects relink cleanly on any workstation.
2. Naming conventions and version control that prevent relink disasters
A sortable filename answers three questions at a glance: when, what camera, and which version.
Token order: YYYY-MM-DD_PROJECT_CAMID_DESC_A###_v01
YYYY-MM-DD: date of capture, not deliveryPROJECT: short client code, e.g.,SmithJonesCAMID:A,B,C, orS8for Super 8DESC: two to four words, no spaces (Ceremony-Vows)A###: three-digit sequence number (A001,A002)v01: version increment for project files and exports only
Example: 2026-08-15_SmithJones_A_Ceremony-Vows_A003_v01.mp4
Versioning rules: increment the project file version (_v02, _v03) every time you make a structural edit, not just a color tweak. Export versions increment when the client sees a new cut. Never overwrite a previous version.
Client-supplied files: do not rename originals. Create an Originals/ subfolder, copy files there untouched, and apply the team convention only to the ingest copies in 01_Assets/. Teams working across macOS and Windows should avoid renaming client originals to prevent relink issues across operating systems.
3. Ingest workflow: checksums, proxies, metadata, and logging
A mandatory logging pass converts raw footage into usable selects. Folders answer where; logging answers what the footage can actually do in the edit.
Step-by-step ingest:
- Back up (3-2-1): copy cards to two local drives and one off-site location before ejecting.
- Verify checksums: use
md5sumor a tool like Hedge or ShotPut Pro to confirm copy integrity. - Create working copies: move originals to
01_Assets/Originals/; never edit from card copies. - Generate proxies: transcode to ProRes Proxy or DNxHR LB for heavy codecs; store in
01_Assets/Proxies/. - Import into NLE project structure: link proxies in the NLE; keep originals on the media drive.
- Log every clip: watch once, note usable moments, flag audio issues, record timecode in and out.
Super 8 specifics at ingest: run Premiere's Scene Edit Detection set to 18fps, export the CSV, then use split_by_scene.py with FFmpeg to auto-split reels into discrete numbered clips. A typical Super 8 roll runs for a few minutes when scanned, so one reel can yield multiple usable segments.
4. How to consolidate your project in Premiere, Resolve, and Final Cut Pro
Built-in media-management tools in all three NLEs can copy, move, or transcode project media, but each requires preflight checks to avoid missing-media surprises after the fact.
Premiere Pro (Project Manager): choose Collect Files and Copy to New Location to preserve originals, or Consolidate and Transcode when you need a single-codec deliverable. Before running it, confirm frame rate and color space match across sequences, remove unused clips from bins, and verify destination storage has enough headroom for handles (add at least 1 second per cut).
DaVinci Resolve (Media Management): use Copy rather than Move until you have confirmed the consolidated project plays back cleanly. Optimized media speeds up playback but adds storage; for archive, transcode to originals or a mezzanine codec and delete optimized media before packaging.
Final Cut Pro (Consolidate): FCP stores media inside a Library bundle by default. Consolidate copies all referenced media into the bundle, which simplifies handoff but inflates size. On a different machine, open the Library directly; FCP relinks automatically if the bundle is intact.
Post-consolidation verification checklist:
- Open the consolidated project on a clean machine (or a new user account) with no cached media
- Relink one clip manually to confirm the path logic works
- Play back at least one representative sequence from start to finish
- Check proxy links: confirm proxies point to the new location, not the original drive
- Run an offline-media check; zero offline clips before delivery
5. Team editing, review, and client handoff
A clean handoff folder removes ambiguity for every editor who touches the project after you. Structure it like this:
Locked_Project_v##.prproj(or.drp/.fcpbundle)Proxies/with all proxy files relinkable from the projectExports/Review/containing the current client-review cutLogs/with the clip log CSV and any selects notesREADME.mdwith project settings, proxy-to-original mapping, and color notes
For cloud review, Frame.io handles frame-accurate comments and version comparison without exporting multiple files. For large raw transfers, MASV watch folders automatically upload files to a cloud portal the moment they land in a designated folder, which removes the manual upload step entirely.
Marking used media in Premiere: the markUsedFootage.jsx script from the BB13/super8-clip-automation repo labels clips already placed in a sequence, so a second editor scanning the bin sees immediately what has been used. On split-reel projects with dozens of numbered Super 8 segments, this alone prevents duplicate selects.
6. Backup, archive, and verify: the 3-2-1 rule applied to wedding projects
The 3-2-1 rule means three copies, two different media types, one off-site. For a wedding project:
| Copy | Location | Media type |
|---|---|---|
| Original cards | Client or production vault | SD/CFexpress card |
| Local working copy | RAID or NAS in studio | HDD/SSD RAID |
| Off-site backup | Cloud (Backblaze B2, AWS S3) or physical vault | Cloud or LTO tape |
Checksums and manifests: generate SHA256 hashes at ingest and again before archive using a tool like hashdeep or Silverstack. Store the manifest as a .csv inside 04_Documents/. If a file's hash changes between ingest and archive, you have a corruption event, not a mystery.
Archive package contents: originals, proxies, project files, approved exports, LUTs, any custom fonts, the clip log, and a README.md with relinking instructions. Nothing else belongs in the archive; nothing in that list should be missing.
7. Super 8 and long-reel workflow: scene detection, FFmpeg, and JSX automation
Running Scene Edit Detection in Premiere at 18fps, exporting the CSV, and using an FFmpeg + Python script to split scanned reels into numbered clips eliminates long scrubbing sessions and enables one-click swapping in the timeline.
Step-by-step:
- Import the scanned
.movreel into Premiere. - Right-click the clip in the Project panel, choose Scene Edit Detection, set frame rate to 18fps.
- Export the detected cut list as a CSV.
- Place
split_by_scene.pyand the FFmpeg binary in the same directory as the CSV and the source.mov. - Run:
python split_by_scene.py cuts.csv source_reel.mov output_folder/ - FFmpeg splits the reel into
S01_,S02_,S03_... numbered clips without re-encoding. - Import the numbered clips into a dedicated Super 8 bin in Premiere.
The BB13/super8-clip-automation repo also supplies JSX scripts that run directly inside Premiere:
cycleNextClip.jsx/cyclePrevClip.jsx: step through Super 8 segments in the bin without touching the mouseswapFootage.jsx: replace a clip in the timeline with the next segment in one keystrokemarkUsedFootage.jsx: label used clips so no segment gets cut twicejumpToClip.jsx: jump the playhead to a specific numbered segment instantly
Pro Tip: Reset subclip timecode to 00:00:00:00 on each split segment before importing. Sequences built from Super 8 clips with inherited reel timecode produce confusing in/out points and make relinking harder if you ever reconform.
For the vintage film aesthetic that Super 8 delivers, consistent clip naming (S8_SmithJones_R01_S03) keeps the bin readable even when you have four reels from the same wedding.
8. Preflight checklist before client handoff or archiving
Run every item before you hand files to a client or move a project to long-term storage:
- Media online: open the project fresh; confirm zero offline clips
- Proxies relinkable: disconnect the proxy drive, relink one proxy manually, confirm the path pattern works
- Exports approved: client sign-off exists for every deliverable in
03_Exports/Finals/ - Checksums verified: compare ingest manifest against archive manifest; hashes must match
- README included:
04_Documents/README.mdlists project settings (codec, frame rate, color space), proxy-to-original mapping, LUT names, and any special notes - Quick restore test: copy one clip from the archive to a fresh folder, relink it in the project, and play it back at full resolution
A professional production preflight confirms resolution, frame rate, and color space before consolidation, not after. Catching a mismatched sequence setting at this stage costs two minutes; catching it after delivery costs a re-export and a client conversation.
What Visualizemedia has learned from real multi-reel projects
Every multi-camera wedding we shoot at Visualizemedia arrives with at least three camera angles, a separate audio track, and, on the projects we love most, one or two Super 8 reels. The folder convention above is not theoretical. It is the exact structure our team uses on every New York and New Jersey wedding, and the reason a second editor can open a project cold and find every clip without a single Slack message.
Our Super 8 work follows the split_by_scene.py workflow described here. On a recent multi-reel project, four scanned reels produced 47 discrete segments. Without the JSX cycling scripts, swapping alternate takes in the highlight reel would have taken the better part of an afternoon. With them, it took under an hour.
[Anthony's professional credentials and years of experience are to be inserted here.]
Follow our work on Instagram for behind-the-scenes looks at how we handle analog film alongside modern multi-camera coverage.
Visualizemedia handles the whole workflow, from ingest to delivery
Visualizemedia offers full-service wedding cinematography in New York and New Jersey, including multi-camera coverage, aerial footage, professional color grading, Super 8 handling, and archive-ready delivery. If your team needs a production partner who already has the ingest, logging, and Super 8 automation workflow built in, or if you are a couple who wants cinematic coverage without managing any of this yourself, see our wedding packages or reach out directly to check availability for your date.
Sources
- BB13/super8-clip-automation
- Media asset management in NLEs
- Video file folder structure (DockBuddy blog)
- How to Organize Footage for Editing (Step-by-Step, 2026) | Storyflow
- Optimizing Super-8 editing in Premiere with FFmpeg and custom JSX