
The fastest, most reliable picks are a fairy light curtain, a sequin panel, or a streamer fringe with balloons, all of which run under $20 and set up in under 20 minutes. The one rule that separates a good backdrop from a flat one: pick a single color story, lean on texture instead of busy patterns, and never go smaller than 6 feet wide by 7 feet tall. Everything else in this guide builds off that.
TL;DR:
- Backdrops should be at least 8 feet by 8 feet for group shots to prevent cropping issues, with textures preferred over busy patterns for timeless quality.
- Lighting with a warm-colored ring light or LED panel directly in front of the subject enhances photo quality more than the backdrop itself.
- DIY options under $20, like fairy light curtains or streamer fringes, are effective and quick to set up, especially when paired with proper lighting and size.
- Outdoor setups require extra precautions, such as weighted bases and zip ties, to prevent wind from disrupting delicate or sequin backdrops.
- Reusable high-end backdrops like velvet drapes or flower walls offer durability and consistent results across multiple events but cost more upfront.
Photobooth Backdrop Ideas: What Makes One Actually Work
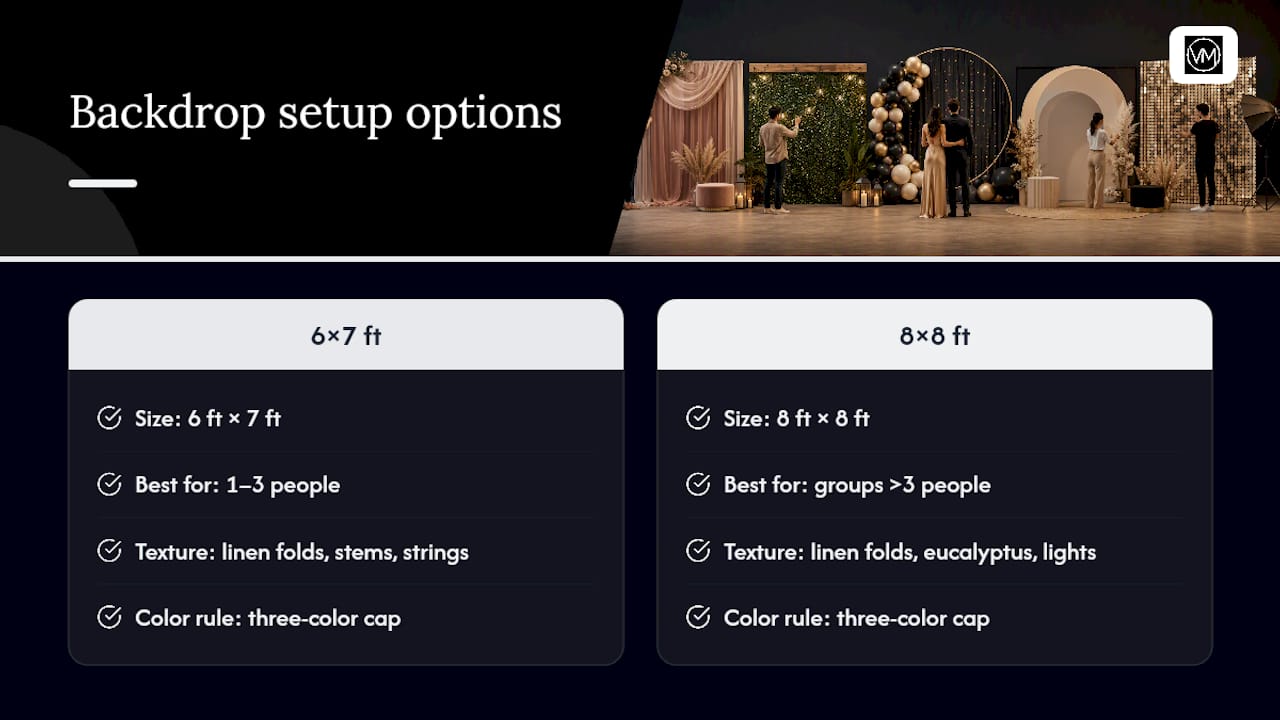
Size is where most DIY backdrops fail before the camera even comes out. A backdrop under 6 feet wide and 7 feet tall crops badly in group shots, and anything meant to hold more than two or three people needs closer to 8 by 8 feet. Texture beats print almost every time. A busy floral pattern or a loud logo competes with faces; linen folds, eucalyptus stems, and strings of light give the camera something to play with without stealing focus. Editors who work with wedding albums long term note that texture ages better than pattern once you're looking back years later, and that a three-color cap keeps the whole scene from feeling busy.
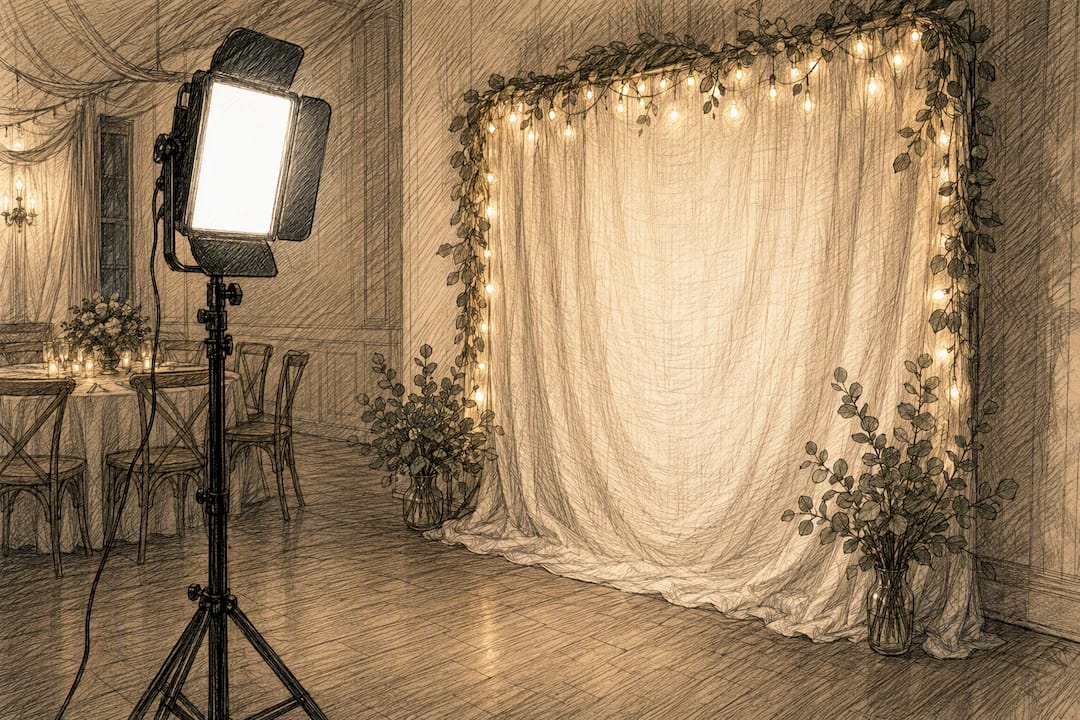
Lighting matters more than the backdrop itself. A $15 to $100 ring light or LED panel aimed at your subject's face will do more for photo quality than a $150 flower wall with bad light. Point light forward, not down, keep the color temperature warm (2700K to 3000K reads as flattering skin tone rather than clinical office light), and give the backdrop a few feet of separation from the subject so it doesn't flatten into the frame. Indoors, you control light and wind. Outdoors, you're fighting both, so budget extra setup time for anchoring and a fallback plan if the breeze picks up.
Photobooth Backdrop Ideas by Budget and Event
Not every event needs the same backdrop, and not every budget needs to stretch past $20. Here's what actually works, broken down by what you're spending and what you're building for.
Budget builds ($0 to $20, 10 to 20 minutes):
- Ironed bedsheet. A plain sheet in a solid color, steamed flat and clipped to a curtain rod or PVC frame, is the cheapest backdrop that still photographs cleanly. Cost: $0 if you already own one. Tip: iron it the morning of, not days before, because folds reappear.
- Streamer fringe. Rows of crepe paper streamers taped to a rod create movement and texture for almost nothing. Cost: around $10. Tip: double up the strands near eye level so the fringe doesn't look thin in photos.
- Kraft paper roll. A wide roll of butcher paper taped to a wall gives you a matte, no-glare surface, and you can hand-letter a monogram or date on it. Cost: $8 to $15. Tip: use painter's tape, not packing tape, so it doesn't tear the wall paint.
- Fairy light curtain. This is the one that punches way above its price. A string-light curtain runs about $12 and photographs beautifully at nearly every event type, from proms to weddings to milestone birthdays. Tip: layer it in front of a plain wall or dark curtain so the lights actually pop instead of disappearing into a busy background.
Midrange builds ($20 to $80, 20 to 45 minutes):
- Balloon garland. An organic balloon arch kit runs $15 to $60 and reads as a full, colorful statement piece. Tip: mix three balloon sizes so the garland has real depth instead of looking like a flat row.
- Sequin curtain. Reversible sequin panels cost $15 to $55 and shimmer under any light source, which makes them forgiving in dim venues. Tip: keep these indoors only, since even a light breeze sends sequins fluttering in a way that looks chaotic on camera.
- Faux flower panels. A DIY flower wall lands anywhere from $35 to $150 depending on density, and density is what separates a lush wall from a sparse one. Plan for roughly one stem per two to three square inches of panel space so nothing looks patchy up close.
- LED neon sign on greenery. A custom neon sign mounted against a eucalyptus or ivy panel typically costs $80 to $300 and doubles as its own light source, cutting down on how much front lighting you need for evening shots.
High-impact, reusable builds ($80 and up):
A dense faux flower wall, a floor-length velvet drape, a full mirror panel, or a hand-painted plywood backdrop all fall into this category. They cost more upfront, but they store flat, reuse across multiple events, and photograph consistently no matter the lighting. Velvet in particular hides wrinkles better than any other fabric on this list, which matters if you're transporting it in a car trunk.
Matching the backdrop to the event:
- Weddings: fairy lights, greenery, or a flower wall photograph well against formal wear and hold up in an album years later.
- Birthdays: balloon garlands and streamer fringe bring energy and color without needing to look elegant.
- Corporate events: a step-and-repeat with a company logo or a neutral velvet panel reads professional; streamers and balloons feel too casual for most branded events.
- Baby showers: a pastel balloon cluster paired with a small flower panel keeps the palette soft without adding cost.
Getting the Size, Placement, and Lighting Right
Two people need at least a 6 by 7 foot backdrop; groups of five or more, or anyone shooting full-length, need closer to 8 by 8 feet. Keep subjects roughly 3 to 4 feet in front of the backdrop so it stays soft in the background instead of looking pasted on.
For lighting, prioritize in this order:
- A ring light or small LED panel pointed at face height, not overhead
- Warm bulbs in the 2700K to 3000K range so skin tones look natural, not blue-tinted
- Placement near an entrance or the bar area, where foot traffic naturally pauses, but away from harsh overhead spotlights that wash out faces
Pro Tip: Set up the full backdrop and lighting the night before, then take test photos under the venue's actual evening lighting, not daylight. A backdrop that looks perfect at 2 PM can look muddy or oddly lit once the sun goes down and the venue switches to ambient bulbs.
Pairing your backdrop with a simple QR code upload station also means guests can drop their own shots into a shared gallery without needing a full rental booth on-site.
Backdrop Mistakes That Ruin Photos (and Easy Fixes)
- Too small a backdrop. Groups spill off the edges and get cropped awkwardly. Fix: size up to at least 8 by 8 feet for anything beyond two people.
- Wrinkled fabric. Cheap sheets and curtains show shadow lines under flash. Fix: steam or iron the morning of the event, not the week before.
- Weak hanging methods. Tape and thin string sag or fall mid-event. Fix: use rated command hooks or an actual backdrop stand, and add a backup fastening point.
- Sequins and loose panels outdoors. Wind turns a shimmering curtain into a flapping mess. Fix: use weighted bases and zip ties for anything outside, and save sequins for indoor setups only.
- Over-theming. Piling on props, signs, and patterns at once competes with the guests in the photo. Fix: pick one focal element and let everything else stay simple.
Your Night-Before Setup and Repair Checklist
- Assemble the full backdrop and take test photos under the venue's actual evening lighting.
- Confirm the dimensions meet the 6×7 minimum (8×8 for groups) and check subject distance.
- Steam or iron any fabric and double-check every fastening point.
- Pack a repair kit: glue dots, command strips, spare string-light bulbs, a mini air pump, and zip ties.
- Assign one person to manage the backdrop on the day and label any prop bins so setup takes minutes, not an hour.
An Editorial Note From Visualize Media
Simple, texture-forward backdrops age better on camera than trend-heavy ones. A fairy light curtain or a linen drape reads consistently across a multi-camera edit, while busy patterns pull focus from the couple and date faster in hindsight. Minimal, well-lit setups also make color grading easier, since there's less competing detail for the lens to fight. If you want a look at how these choices play out in real cinematic coverage, check our work on Instagram.
— Anthony
When You'd Rather Hire the Pros
DIY backdrops work great for smaller, casual events, but larger weddings, corporate functions, and luxury celebrations often call for more polish and less on-site stress. Photobooth services are often offered alongside luxury wedding videography, including packages built around multi-camera coverage, professional color grading, and cinematic storytelling rather than a DIY setup you're managing solo.
If you're planning coverage for the ceremony wall or entrance backdrop, our lighting setup guide covers the same warm-temperature, subject-first approach mentioned above, applied to full wedding-day filming. Corporate clients looking for a branded step-and-repeat paired with professional video coverage can see options on our corporate production page. For couples coordinating overall wedding-day styling, from hair to backdrop colors, these styling ideas are worth a look too.
Whether you're building your own backdrop or want it handled alongside full cinematic coverage, Visualize Media can walk you through package details and check availability for your date.
Sources
- Photo Booth Backdrop Ideas — 20 DIY Setups That Look Like a $1,000 Rental (2026) | PolaroidCam Blog
- Photo booth ideas for weddings (Snapeen)
- Wedding photo booth ideas (Scene Disposable blog)
FAQ
What is the best background for a photo booth?
A fairy light curtain is one of the most consistently flattering and affordable options, working well for weddings, birthdays, and proms alike at around $12.
How do I make a backdrop for a photo booth?
Choose one texture or color story, hang it on a rod or backdrop stand at a minimum of 6 feet wide by 7 feet tall, steam out wrinkles, and test it under your venue's actual lighting the night before.
What is the cheapest way to make a backdrop?
An ironed bedsheet or a streamer fringe taped to a rod costs $10 or less and still photographs cleanly when paired with decent front lighting.
How do I put a background on my photo booth?
Hang the backdrop from a curtain rod, PVC frame, or dedicated backdrop stand using rated hooks or clips, keep subjects three to four feet in front of it, and light their faces directly rather than lighting the backdrop itself.